EMV - Elektro Multi Vision: Difference between revisions
Jump to navigation
Jump to search
Latest revision as of 00:49, 16 June 2023
Overview
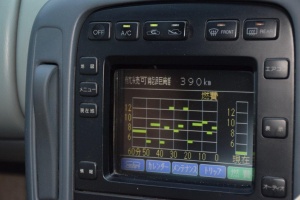
The Elektro Multi Vision interface consists of an LCD screen with touch screen functionality and is used for:
- Climate Control
- Satellite Navigation (not compatible with newer systems such as GPS)
- Audio controls (AM & FM Radio, CD stacker, DSP)
- TV (Japanese NTSC system)
- Trip Computer showing eg Fuel Consumption, distance to empty, most recent trips
- Service Reminders
- Calendar and electronic personal organiser
- System diagnostics
- Reversing camera display (if the vehicle is fitted with the opional reversing camera)
- Display of auxilliary video input (if fitted with optional connector)
Notes
- The EMV normally displays black text on a white background but automatically reverses the colour scheme when lights are turned on or when the vehicles enters a dark area such as eg passing under a bridge.
- For safety, the TV (and auxilliary video inputs) will be disabled when the vehicle is moving. Some vehicles are known to have been rewired to bypass this, which may be appropriate when used to display after-market GPS data on the EMV screen.
- Much of the text on the various EMV screen layouts is in Japanese (translated here) though some screens are in English.
How to remove the EMV
The steps to remove the EMV are:
- Remove the gear shifter
- Remove the gear shifter surround
- Remove the centre console trim
- Remove the glove box
- Disconnect the plug for the ventilation control panel from behind the glove box. Then, that control panel can stay attached to the EMV.
- Unbolt the EMV (4 x 8mm, 2 x 10mm)
- Disconnect the wiring plugs at the back of the EMV. If you’re “just” removing the emv, there’s no need to disconnect the plugs in the white “box” underneath the EMV
- Disconnect the single (earth?) wire plug that comes out of the emv

